Understanding the Epoxy Flooring Installation Process
What to Expect When You Book with 33 DreamCrete
If you’re considering epoxy flooring for your garage, patio, or workspace, you might be wondering: What does the installation process actually involve?
At 33 DreamCrete, we take pride in delivering flawless, long-lasting results—and that starts with a precise and professional process. Here’s a step-by-step guide to what you can expect when you choose us to transform your concrete.
1. Consultation & Quote
It all starts with a free on-site consultation. We evaluate your existing concrete, discuss your goals, and help you choose colors, flake styles, and finishes that match your style and needs. Then we provide a clear, no-pressure estimate.
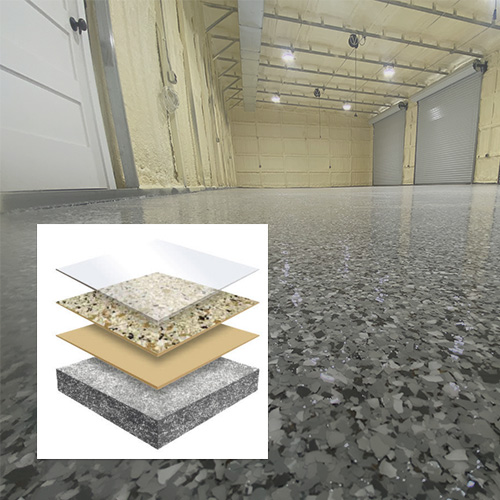
2. Concrete Surface Prep
This is one of the most important steps in ensuring your coating lasts. We use professional grinders with diamond tooling to mechanically profile the concrete surface. This removes any old coatings, opens the pores, and creates the perfect surface for bonding.
We also:
-
Repair cracks and damage
-
Fill joints, if requested
-
Ensure the surface is clean and dry
💡 Pro Tip: Proper prep is what separates professional installs from DIY disasters.
3. Primer Coat Application
A high-quality primer is applied to penetrate and bond deeply with the concrete. This improves adhesion and helps prevent issues like peeling or bubbling down the road.
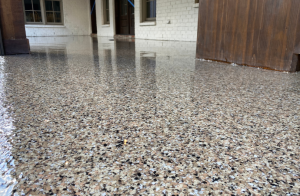
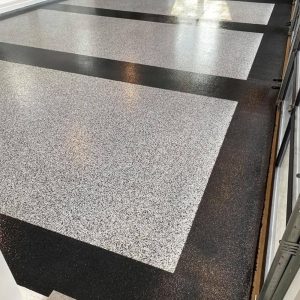
4. Base Coat & Decorative Options
Next, we apply the base coat, which may be tinted depending on your color choice. While the base coat is still wet, we apply your chosen decorative flake (or metallic pigment, depending on the system).
This is where the custom look of your epoxy floor really takes shape.
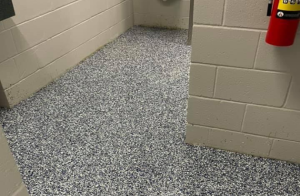
5. Scrape & Topcoat
Once the flakes have cured into the base coat, we scrape off any excess and vacuum the surface to ensure an even finish. Then we apply a UV-stable polyaspartic topcoat, which seals everything in and adds scratch, stain, and chemical resistance.
6. Curing Time
-
Walkable: Typically within 6–12 hours
-
Light Use: Within 24 hours
-
Full Vehicle Use: After 48–72 hours
We’ll let you know exactly when your new floor will be ready based on the season and product system used.
7. Final Walkthrough & Care Tips
We’ll walk the space with you to make sure you’re thrilled with the results—and we’ll leave you with tips on how to keep your floor looking great for years to come.
Final Thoughts
Epoxy flooring isn’t just a coating—it’s a craft. At 33 Dreamcrete, we follow a time-tested, detail-driven process that delivers long-lasting beauty and performance. Whether you’re upgrading your garage, shop, or outdoor area, we’re here to make it smooth, simple, and stress-free.
Book Your Free Consultation Today
Want a floor that’s as tough as it is beautiful? Let’s talk.
👉 Schedule your free on-site consultation and quote with 33 DreamCrete now.